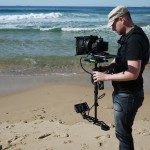
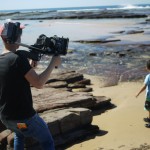
Recently, an up and coming band called Beaten Bodies asked me to shoot a Music Video for them. I was keen. I was also looking to do something new. Not necessarily out of this world new, not like hiring an F65 new, but something different with the tools I had available to me.
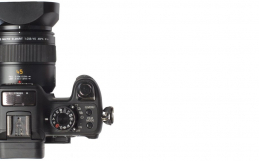
Around that time, I’d started reading about the Magic Lantern hack that brought raw video to Canon’s DSLRs, most successfully on the 5D Mk III. The idea that what is still fundamentally a stills photography camera was now able to shoot 25fps 14 bit raw video was astounding. The hack, whilst still in beta, was easy to download, and best of all, it’s free.
After a bit of research, I decided to give this new technology a shot, and this post is about how I started my project of shooting a low budget Music Video on the Canon 5D in Raw.
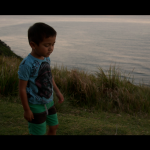
Check out the Music Video we did below, before we dive into the details of the 5D shooting Raw and what it was like to use.
*note*: Some footage for the video (primarily the beginning and ending, was shot on the Black Magic Cinema Camera)
Raw video, especially on the EOS platform, brought forward a number of benefits to the 5D that interested me. Despite a plethora of forum users touting that the 5D Mk III was now essentially better than the Alexa, I wanted to know what it could do in a real shooting situation, not just in abstract tests. The purported benefits of the hack are outlined below:
Benefits of the Magic Lantern Raw Hack
-
Increase in sharpness
-
Reduction or Moire
-
Increase in Dynamic Range
-
More accurate colors
-
Increase in adjust ability in post


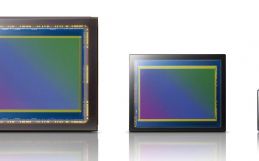
It’s always been a struggle for me, shooting in situations where exposure levels differ above 8 stops, and despite my best efforts, it’s a flaw I’ve never been able to fully overcome. So my biggest problem with DSLR video has always been its limited dynamic range, and even though Canon claims up to 11 stops, my results, and other results from people across the globe, seem to have shown closer to 10 stops. So I was primarily interested what this new hack would mean for dynamic range on the 5D mk3.
Online, users were claiming up to 13 stops of actual dynamic range by exposing to the right, in other words, exposing for the highlights and balancing it all out when they processed the raw files. Not only that, the workflow (which results in raw files being converted into individual dng files for each frame) was claimed to give the footage a more ‘filmic’ look due to a truer progressive format (rather than the footage being compressed to an mpeg4 codec within the camera).
So naturally, with all these bold claims, I was quick to jump on the 5D raw bandwagon, and couldn’t wait to try it out. So, did it live up to the hype? Yes & No. Lets start take a look:
Getting Hacked
There is a lot already written about the Hack and how great it can be. I was desperate to try the raw hack for myself, and in my foolishness, I ignored a lot of the advice out there and chose to use the 5D raw for the first time on a paid project with a tight schedule. You might think that sounds like a recipe for disaster, well, you might be right.
Whilst the camera performed extraordinarily well with the hack, and the increased control it gave me over what I was shooting was fantastic, the raw hack is by no means an easy thing to get along with. In fact, it presented some very serious issues that I think people wanting to use the hack should be aware of, especially in choosing when and when not to use the raw feature on a project.
The specifics of what it was like to deal with:
Before I could load the hack onto my 5d, I had to downgrade the firmware, consequently removing clean HDMI out and the option to have both an external monitor and the camera screen displaying a mirrored liveview feed.
This creates a whole host of problems, and even though most can be overcome with an HDMI splitter enabling two external monitors, it was still an issue.
People had seemed to skim over this issue online, but it quickly became a big one when on the shoot we needed to go handheld with a shoulder rig. In the past, the camera screen acted as a good second monitor from which the director could get a good idea of what the shot looked like. Without that, the shoot felt less connected, making what we were trying to achieve a little trickier.
With the Raw hack, only the operator could realistically use the one external monitor (and it was impractical to set up a split signal due to the nature of going handheld). We had to rely on the shoot/playback method, made slower due to the fact that that the playback of raw is not able to play in real time, and only in black and white, which ultimately chewed up time on the day.
Sharpness
There is a nice improvement to the resolvable detail of the image. It doesn’t have that muddy look, moire is gone as far as I can tell. The images look nice, really nice. There is none of that artificially sharpened look, its organic and rich looking. There’s not much to complain about here: it’s all pluses in my books.
Dynamic Range Boost
Apart from these perhaps overly specific technical annoyances (It’s a DSLR after all), the more important question is what benefits the raw hack gave to dynamic range. By exposing for the highlights and lifting the shadows in post processing, I was able to get some really beautiful shots, especially at sunset. I’d say the dynamic range is comparable to the Black Magic Cinema Camera, but nothing significantly more. In saying that however, comparing to the BMCC is certainly no insult, and I can see the potential for the hack in seriously upgrading the camera’s ability in tricky situations.
The raw hack does considerably extend the dynamic range, but that’s not without a tradeoff – you have to underexpose during the shoot (to varying degrees depending on what you’re trying to achieve) and process the raw files to achieve the look you were shooting for (which adds another component to think about and work around on a project). Sure, you can shoot normally and I’ve read the hack slightly extends dynamic range by utilizing the sensor in a different way, but in that situation, in my opinion the improvements are nominal and unjustified given the added difficulties.
Pink Spots
Benefits aside, there’s a very serious problem the raw hack presents. Now, the raw hack is just that – a hack. It uses the camera in a way that Canon didn’t design for, and as such, it can sometimes produce some very odd, and very problematic results (see below) I’m not sure whether to call these pink dots artifacts, or just pink dots, but whatever they are, they’re an insanely big problem. They occur randomly, and it’s impossible to tell what shot they will affect. The effect lasts for about 2 seconds, but if that happens during a perfect take, the whole take is ruined.
Luckily on our project we could cut around it, but it’s frightening to think that using the raw hack comes with the risk of ruined takes. Most, if surely not all people can’t afford for that to happen, and ultimately it truly brings home the reality that this hack is still in beta for a reason.

Post
The hacked camera was great to use. The Magic Lantern interface was intuitive, and it provides a whole host of extremely useful additional features, as well as the ability to shoot in a range of aspect ratios and frame rates. It’s hard to deny that being able to shoot raw video on a stills camera felt exciting, and to back it up, the footage it produced does look good. Whilst I would say that this hack has the potential to change the way DSLR’s can be used for all forms of film making, there’s vital problems that cannot be disregarded as serious flaws in this hack’s usability.
Another one of these problems (apart from the pink spots) is that the camera is very difficult to deal with in post. That’s fine if you’re not the editor, but if you are, or if you know the editor, prepare for some serious complaining. The raw files aren’t only massive (that’s a given in any case), they currently can’t be natively processed in any program.
So, after converting the raw file into individual dng images (taking up quite a bit of space), you have to process them in a program capable of batch processing raw images (Adobe Camera Raw and After Effects are the most commonly used). This process requires you export the processed dng’s as TIFF images (taking up even more space), and then convert the TIFF images into an image sequence through another program which finally results in a pro res mov file.
It’s not a fast process by any means. Some use Da Vinci Resolve, which can play and process dng images as an image sequence, but the computer processing power needed is intense, and I’ve read it can be a strain on even the most serious setups. So, if you choose to shoot raw, prepare for the inevitable headache when you get to post.
-

- Unprocessed Raw
-

- Processed Raw
-
- Final Graded Image
Conclusion
I guess my overall message is that unless you are sure you have the time and resources to shoot raw, you should think very carefully before you load the hack onto your 5d and shoot a paid job. Apart from the more serious issues I’ve outlined in this article, it’s a new technology for canon cameras, and it undeniably needs some wearing in before its ready for the masses.
Raw video technology in prosumer cameras is still very much in the early stages. The images are really great but it can be hard work. It doesn’t in any way make the 5D easier to use as a video camera, in fact in some it makes it harder.
Given my time again, I’d choose to only shoot raw on a project with a budget that justifies such a decision, and even then, I would rent a Scarlet rather that deal with the 5d raw and its hassles.
For me, 5d raw is still something to play with rather than use on professional shoots. Don’t get me wrong, it’s a great new feature, and I cannot thank the Magic Lantern team enough, but don’t get wrapped up in all the raw hype and forget that you don’t necessarily need it to shoot amazing footage. And, well, if you do need it, make sure you need it for the right reasons, and are fully prepared to deal with all the curve balls it might throw your way.
What ever you do, have fun and keep shooting,
Kieran Hoyle